Posts

Showing posts from 2009

Changing Date and Time in Linux

Syntex: 1. date -s "DD Mon YYYY hh:mm:ss" 2. date set="DD Mon YYYY hh:mm:ss" 3. date MMDDhhmmYYYY.ss Example: 1. date -s "28 NOV 2008 13:45:00" 2. date set="28 NOV 2008 13:45:00" 3. date 112813452009 Setting Time in Linux Syntex: date +%T -s "hh:mm:ss" Example: date +%T -s "10:13:13"

Deleting Files/Folders based on OWNERSHIP

1. List the files and directories. $ ls -lah total 52K drwxrwxrwt 11 root root 4.0K Nov 4 03:52 . drwxr-xr-x 25 root root 4.0K Oct 6 03:54 .. srwxr-xr-x 1 george george 0 Oct 8 00:47 .dguardianipc srwxr-xr-x 1 george george 0 Oct 8 00:47 .dguardianurlipc -rw-r--r-- 1 root root 0 Nov 4 03:52 file1 -rw-r--r-- 1 gopher gopher 0 Nov 4 03:52 file2 -rw-r--r-- 1 gopher gopher 0 Nov 4 03:52 file3 -rw-r--r-- 1 gopher gopher 0 Nov 4 03:52 file4 -rw-r--r-- 1 gopher gopher 0 Nov 4 03:52 file5 -rw-r--r-- 1 root root 0 Nov 4 03:52 file6 -rw-r--r-- 1 root root 0 Nov 4 03:52 file7 drwxrwxrwt 2 root root 4.0K Oct 1 07:55 .font-unix drwxrwxrwt 2 root root 4.0K Oct 1 07:55 .ICE-unix drwxr-xr-x 2 root root 4.0K Nov 4 03:43 test1 drwxr-xr-x 2 root root 4.0K Nov 4 03:51 test2 drwxr-xr-x 2 root root 4.0K Nov 4 03:43 test[2-7] drwxr-xr-x 2 root root 4.0K Nov 4 03:43 test2-7 drwxr-xr-x 2 george george 4.0K N...

Easy way to extract Logs on a Date/Line Range in LINUX

Example: range of date to be extracted in the /var/log/message. Oct 26-27 our x will be Oct 26, y will be Oct 27 1. Get the first line number which will be our x reference (x - Oct 26). $ grep -n 'Oct 26' /var/log/messages | head The initial reference of x = 29933 Sample Output: 29933:Oct 26 00:00:00 postfix nagios: LOG ROTATION: DAILY 29934:Oct 26 00:00:00 postfix nagios: LOG VERSION: 2.0 29935:Oct 26 00:00:00 postfix nagios: CURRENT HOST STATE: localhost;UP;HARD;1;PING OK - Packet loss = 0% 29936:Oct 26 00:00:00 postfix nagios: CURRENT SERVICE STATE: localhost;Current Load;OK;HARD;1;OK 29937:Oct 26 00:00:00 postfix nagios: CURRENT SERVICE STATE: localhost;Current Users;OK;HARD;1 29938:Oct 26 00:00:00 postfix nagios: CURRENT SERVICE STATE: localhost;HTTP;WARNING 29939:Oct 26 00:00:00 postfix nagios: CURRENT SERVICE STATE: localhost;PING;OK;HARD;1;PING OK - Packet loss = 0% 29940:Oct 26 00:00:00 postfix nagios: CURRENT SERVICE STATE: localhost;Root ...

Google Sitemap Generator Installation in a CentOS Platform

1. Download Google Site Map Generator: http://code.google.com/p/googlesitemapgenerator/downloads/list 2. Unpack the downloaded file $ tar –zxvf sitemap_linux-i386-beta1-20090225.tar.gz 3. Run the installation script $ cd sitemap-install/ $ ./install.sh -t /usr/sbin/apachectl -g apache Other options: * -h displays help about these command line options. * -d directory specifies a non-default installation directory. * -a Apache-binary-filename specifies the path to the Apache binary file (httpd). Alternatively, you can specify this value during installation. * -c Apache-config-filename specifies the Apache root configuration file. * -g Apache-group specifies the user group name under which Apache is running. * -t Apache-control-filename specifies the Apache control script (apache ctl). If you specify this value, the installer lets you choose to automatically restart Apache at the end of the installation. If you omit this option...

MySQL Commands - Adding User, Backup and Restore

Adding new user to access the database Syntax: mysqldump -u [username] -p [password] [databasename] > [backupfile.sql] Examples: mysql> GRANT all ON mydatabase.* TO myuser@'192.168.17.186' IDENTIFIED BY 'mypassword'; mysql> GRANT all ON mydatabase.* TO myuser@'localhost' IDENTIFIED BY 'mypassword'; mysql> FLUSH PRIVILEGES; Making Backup of the Database Syntax: mysqldump -u[mysqluser] -p[password] [databasename] > [destinationfile.sql] Example: $ mysqldump -utestaccount -pg3pass employeefile > employeefile-dump.sql Restoring MySQL Database $ mysql -uaccount -ppassword employeefile Making Backup of the existing Table Syntax: create table <Table Destination> as select * from <Table Source>; Example: create table RADUSAGE_09082009 as select * from RADUSAGE;

Killing a Process in Linux

At times we encounter java process that won't stop by issuing the usual command "./shutdown.sh", or in some cases a multiple instance was created when the program was not properly restarted. Below are the sample process status of the java in my linux box. [root@geone bin]# ps -eaf | grep java root 27272 1 0 Jul06 ? 00:00:22 /usr/java/j2sdk1.4.1_01/bin/java root 27684 27273 0 Jul06 ? 00:03:01 /usr/java/j2sdk1.4.1_01/bin/java root 27685 27273 0 Jul06 ? 00:04:23 /usr/java/j2sdk1.4.1_01/bin/java root 27686 27273 0 Jul06 ? 00:03:01 /usr/java/j2sdk1.4.1_01/bin/java root 27687 27273 0 Jul06 ? 00:03:01 /usr/java/j2sdk1.4.1_01/bin/java root 27688 27273 0 Jul06 ? 00:03:04 /usr/java/j2sdk1.4.1_01/bin/java root 27689 27273 0 Jul06 ? 00:03:04 /usr/java/j2sdk1.4.1_01/bin/java root 27690 27273 0 Jul06 ? 00:03:04 /usr/java/j2sdk1.4.1_01/bin/java root 27691 27273 0 Jul06 ? 00:03:01 /usr/java/j2sdk1.4.1_01/bin/java root 27692 27273 0 Jul06 ? 00:03:01 /usr/java/j2sdk1.4.1_01/bin/java root 2...

A Note on Traffic Exchange Programs

Image
We understand that our publishers are always looking for ways to attract interested users to their sites. But using third-party tools or services to increase your site traffic may lead to invalid clicks or impressions and result in your account being disabled. For this reason, we'd like to provide you with some guidance about this. As many of you already know, our program policies strictly prohibit any means of artificially generating ad impressions or clicks, including third-party services such as paid-to-click, paid-to-surf, auto-surf, and click-exchange programs. These programs offer incentives for users to view web pages or click on ads, resulting in activity that is harmful to our advertisers. We occasionally receive questions from publishers interested in using traffic exchanges to bring traffic to their site. While these services may help advertise your site, we don't recommend using them, as they may also result in similar invalid activity. We realize that you may have ...

Setting-up Nagios in Ubuntu

Image
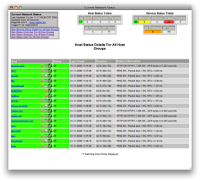
1. Overview Nagios is a powerful tool that provides you with instant awareness of your organization's mission-critical IT infrastructure. Nagios allows you to detect and repair problems and mitigate future issues before they affect end-users and customers. 2. Platform Ubuntu (Desktop) 8.04 Hardy Heron Username : nagios Password : "password" Nagios Version 3.0.3 Nagios Plugin 1.4.13 Nagios NRPE Plugins 2.12 (For clients / Hosts) NSClient++ Win32-0.3 (For Clients / Hosts) 3. Installation 3.1. Nagios Server 3.1.1. Required Packages Make sure you've installed the following packages on your Ubuntu installation before continuing. Apache 2 GCC compiler and development libraries GD development libraries You can use apt-get to install these packages by running the following commands: $ sudo apt-get install apache2 $ sudo apt-get install build-essential $ sudo apt-get install libgd2-xpm-dev 3.1.2. Account Information Become the root user. $ sudo -s Create a new nagi...

Linux 2.6.30 Gets New Filesystems

Image
Article Source : Desktop Linux Linus Torvalds (pictured) announced Linux kernel 2.6.30, adding several new filesystems, including the NILFS2 log-structured filesystem. Linux 2.6.30 enhancements include a local caching layer for NFS data, the RDS server cluster communications protocol, the Tomoyo security module, and support for LZMA and BZIP2 compression algorithms. The 2.6.30 release arrives less than three months after Linux kernel 2.6.29 , which added a wide variety of driver and header updates, WiMAX support, the embedded-oriented Squashfs filesystem, and a preliminary new Btrfs filesystem. The new kernel release further feeds Linux developers' insatiable appetite for new filesystems. The new NILFS2 treats the whole disk as a consecutive list of blocks (or "log"), and never rewrites blocks. As a result, all modifications and creations are converted into sequential operations, which are said to be faster. Other NILFS2 improvements are said to include the ability to of...

First Major PHP Update in Years Coming Soon

Thursday, 25 June 2009 17:07 Article Source internetnews.com PHP 5.3 could be out as soon as Tuesday, June 30th. The new open source language release is a big deal for a lot of reasons, not the least of which is the fact that by my count this is the first major update to PHP since 2006 and the PHP 5.2 release. PHP 5.3 is also interesting in that it includes at least one key feature that was originally intended for PHP 6 (whenever -- if ever -- that release will be out). I spoke with Zeev Suraski, co-founder and CTO at commercial PHP vendor Zend Technologies last month about PHP 5.3. He noted that one key feature backported from PHP 6 into PHP 5.3 is namespaces , which is a way to encapsulate classes and other PHP items more easily. Read rest of the content at Internetnews

Opera Kicks It Up A Notch With Unite

Article Source Linux Magazine June 26, 2009, 5:22 am A few weeks ago I took Opera 10 beta for a test drive to see if the Opera folks had a shot at claiming serious share on the desktop. While Opera 10 is the best Opera release yet, it didn’t seem to have any killer features that would drive adoption. Last week, Opera pulled the other one and released Opera Unite: the killer feature that might put Opera over the top... Read rest of the content at Linux Magazine

Script in Monitoring Your LINUX Server

You can use this as pattern in monitoring you server. 1. Create a file "system-check.sh" and paste the code below: (this will monitor - apache, java, postfix, mail que, mysql and failed logins) echo echo "youserver.com.ph" date echo vmstat 5 5|awk -F" " '{print $4" "$5" "$8" "$16}' echo --------------------------------- df -k echo --------------------------------- ps -eaf | grep httpd echo --------------------------------- ps -eaf | grep java echo --------------------------------- ps -eaf | grep postfix echo --------------------------------- ps -eaf | grep -c smtp echo --------------------------------- ps -eaf | grep mysql echo --------------------------------- lastb | head _______________ Note: you can add a service check by changing syntax below: ps -eaf | grep <service> e.g. ps -eaf | grep named Checking logs: tail /usr/local/apache/logs/error_log 2. Create a file "system-check.cron" and insert the c...

Ruby on Rails in Ubuntu

Install the Dependencies: Build-essentials Ruby: $ wget ftp://ftp.ruby-lang.org/pub/ruby/1.9/ruby-1.9.1-p129.tar.gz $ tar -xzvf ruby-1.9.1-p129.tar.gz change directory to the extracted directory $ sudo ./configure $ sudo make $ sudo make install RubyGems: $ wget http://rubyforge.org/frs/download.php/57643/rubygems-1.3.4.tgz $ tar -xzvf rubygems-1.3.4.tgz change directory to the extracted directory $ sudo ruby setup.rb $ gem -v Rails: $ sudo gem install rails --include-dependencies Terminal Output: INFO: `gem install -y` is now default and will be removed INFO: use --ignore-dependencies to install only the gems you list Successfully installed rake-0.8.7 Successfully installed activesupport-2.3.2 Successfully installed activerecord-2.3.2 Successfully installed actionpack-2.3.2 Successfully installed actionmailer-2.3.2 Successfully installed activeresource-2.3.2 Successfully installed rails-2.3.2 7 gems installed Installing ri documentation for rake-0.8.7... Installing ri documentation ...

Ruby on Rails with Mongrel Clusters Connecting to Oracle Database

Note: First disable selinux. to check the config edit "/etc/sysconfig/selinux", if you made changes reboot the system. Install the dependencies: Development Libraries: $ yum -v groupinstall "Development Libraries" $ yum -v groupinstall "Development Tools" Zlib: $ yum install zlib zlib-devel Readline: $ yum install readline-devel Freeimage: $ wget http://nchc.dl.sourceforge.net/sourceforge/freeimage/FreeImage3120.zip $ unzip FreeImage3120.zip $ make $ make install 1. Download and install Ruby 1.8.6 patch 111 Ruby download site : http://www.ruby-lang.org/en/downloads/ $ wget ftp://ftp.ruby-lang.org/pub/ruby/1.8/ruby-1.8.6-p111.tar.gz $ tar xzvf ruby-1.8.6-p111.tar.gz $ cd ruby-1.8.6-p111 $ ./configure $ make $ make install Try checking the version if the installation goes well $ ruby -v Output: ruby 1.8.6 (2007-09-24 patchlevel 111) [i686-linux] 2. Download and install Gem 1.0.1 $ wget http://rubyforge.org/frs/download.php/29548/rubygems-1.0.1.tgz $ tar xzvf...

Implementing Subversion - CentOS

Note: Apache is a requirement in setting up the Subversion. 1. Installing subversion. $ yum install mod_dav_svn subversion 2. Configuring subversion's apache. $ nano /etc/httpd/conf.d/subversion.conf Make sure that these are loaded: # Make sure you uncomment the following if they are commented out LoadModule dav_svn_module modules/mod_dav_svn.so LoadModule authz_svn_module modules/mod_authz_svn.so # Add this directive <Location /repos> DAV svn SVNPath /var/www/svn/repos AuthType Basic AuthName "Subversion repos" AuthUserFile /etc/svn-auth-conf Require valid-user </Location> 3. Create an SVN user. $ htpasswd -cm /etc/svn-auth-conf svnuser 4. Configure the repository. $ cd /var/www/ (or the default apache web folder) $ mkdir svn $ cd svn $ svnadmin create repos $ chown -R apache.apache repos $ service httpd restart 5. Accessing the URL using a browser. http://serversIPorDomain/repos or http://192.168.0.xxx/repos ref : wiki centos

ProFTPD and VSFTPD Server Installation

Vsftpd installation and simple configuration - CentOS 5.2 1. Install the package via yum. $ yum install vsftpd.i386 2. The default configuration is located at /etc/vsftpd/vsftpd.conf, edit and apply configurations below. # Allow anonymous FTP? anonymous_enable=NO # Uncomment this to allow local users to log in. local_enable=YES # Uncomment this to enable any form of FTP write command. write_enable=YES # Add this line to jail users on their home directories. chroot_local_user=YES 3. Start VSFTPD $ /etc/init.d/vsftpd start Proftpd Vsftpd installation and simple configuration - CentOS 5.2 1. Login as root, download and install the package: $ wget http://software.virtualmin.com/gpl/centos/5.2/i386/proftpd-1.3.0a-3.el4.i386.rpm $ rpm -ivh proftpd-1.2.10-1.fc1.i386.rpm 2. The default configuration can be found at /etc/proftpd.conf, edit and apply configurations below. ServerType standalone DefaultServer on # Use this to excude users from the chroot DefaultRoot ~ !adm # Use pam to authenticat...

Adding Swap File to Currently Installed Ubuntu OS

1. Create a file with a size you prefer. # sudo dd if=/dev/zero of=/mnt/512Mb.swap bs=1M count=512 2. Format the created file # sudo mkswap /mnt/512Mb.swap 3. Add the swap to the running system. # sudo swapon /mnt/512Mb.swap to check if the swap file has been activated use # cat /proc/meminfo or # free -t 4. To make the swap permanent every other boot. # gksudo gedit /etc/fstab Add the line at the end of the file /mnt/512Mb.swap none swap sw 0 0 5. Save and reboot the system. source: help.ubuntu

Testing Radiator Radius via PHP Client

1. Install Apache and PHP with radius module. reference : http://freeradius.org/mod_auth_radius/ (XAMPP Package has pre-installed radius module, you can use this for alternative installation) 2. Create a PHP script for the authentication test, use the content below. <html> <head><title>RSA Test</title></head> <body bgcolor=#ffc7 text=#000000> <?php $challenge = false; $loginAccepted = false; $error = false; if (isset($_POST['uname'])) { $radius = radius_auth_open(); if (!radius_add_server($radius,'[IP ADDRESS]',[PORT],'[secret]',60,1)) { $error = radius_strerror($radius); } else if (!radius_create_request($radius,RADIUS_ACCESS_REQUEST)) { $error = radius_strerror($radius); } else { radius_put_attr($radius,RADIUS_USER_NAME,$_POST['uname']); if (isset($_POST['challenge'])) { radius_put_attr($radius,RADIUS_USER_PASSWORD,$_POST['challenge...

Radiator Radius Installation connecting to ORACLE (CentOS)

1. Download and install the Oracle client connectors. http://www.oracle.com/index.html oracle-instantclient-basic-10.2.0.3-1.i386.rpm oracle-instantclient-devel-10.2.0.3-1.i386.rpm oracle-instantclient-sqlplus-10.2.0.3-1.i386.rpm rpm -Uvh oracle-instantclient-basic-10.2.0.3-1.i386.rpm rpm -Uvh oracle-instantclient-devel-10.2.0.3-1.i386.rpm rpm -Uvh oracle-instantclient-sqlplus-10.2.0.3-1.i386.rpm 2. Set the environment variables. # ORACLE_HOME=/usr/lib/oracle/10.2.0.3/client/lib # export ORACLE_HOME # export LD_LIBRARY_PATH=$ORACLE_HOME # TNS_ADMIN=/usr/lib/oracle/10.2.0.3/client/admin # export TNS_ADMIN # mkdir /usr/lib/oracle/10.2.0.3/client/admin 3. Edit /etc/profiles and insert the lines below. ORACLE_HOME=/usr/lib/oracle/10.2.0.3/client/lib export ORACLE_HOME export LD_LIBRARY_PATH=$ORACLE_HOME TNS_ADMIN=/usr/lib/oracle/10.2.0.3/client/admin export TNS_ADMIN 4. Create a file "tnsnames.ora" and insert the settings below. SERVER1= (DESCRIPTION = (ADDRESS_LIST = (ADDRESS = ...